Get started
I am a seller
If you want to use the APIs via an aggregator or plugin, you will need credentials to identify yourself. There are several ways of managing the connection with these aggregators or plugins

You can manage the connection with the API Credentials Management
page,
more specifically :
- Connect my Agregator to my account (Agregator selector)
- Connect my Agregator’s clientId to my account (agregator provided clientId)
- Get dedicated credentials for my agregator or my plugin (create a clientId)
If you are a vendor yourself but would like to develop your own connection to our APIs, you will need to follow the steps below.
Step 1 – Get your credentials

You can manage the connection with the API Credentials Management page. (Create my clientId and clientSecret)
Your clientId should now be linked to your seller account.
Step 2 – Retrieve the API Collection
For easier testing, you can use the provided Postman Collection below.
This collection uses Postman
Import your downloaded collection
You can download the postman collection : Download here
Then import it from the following screen
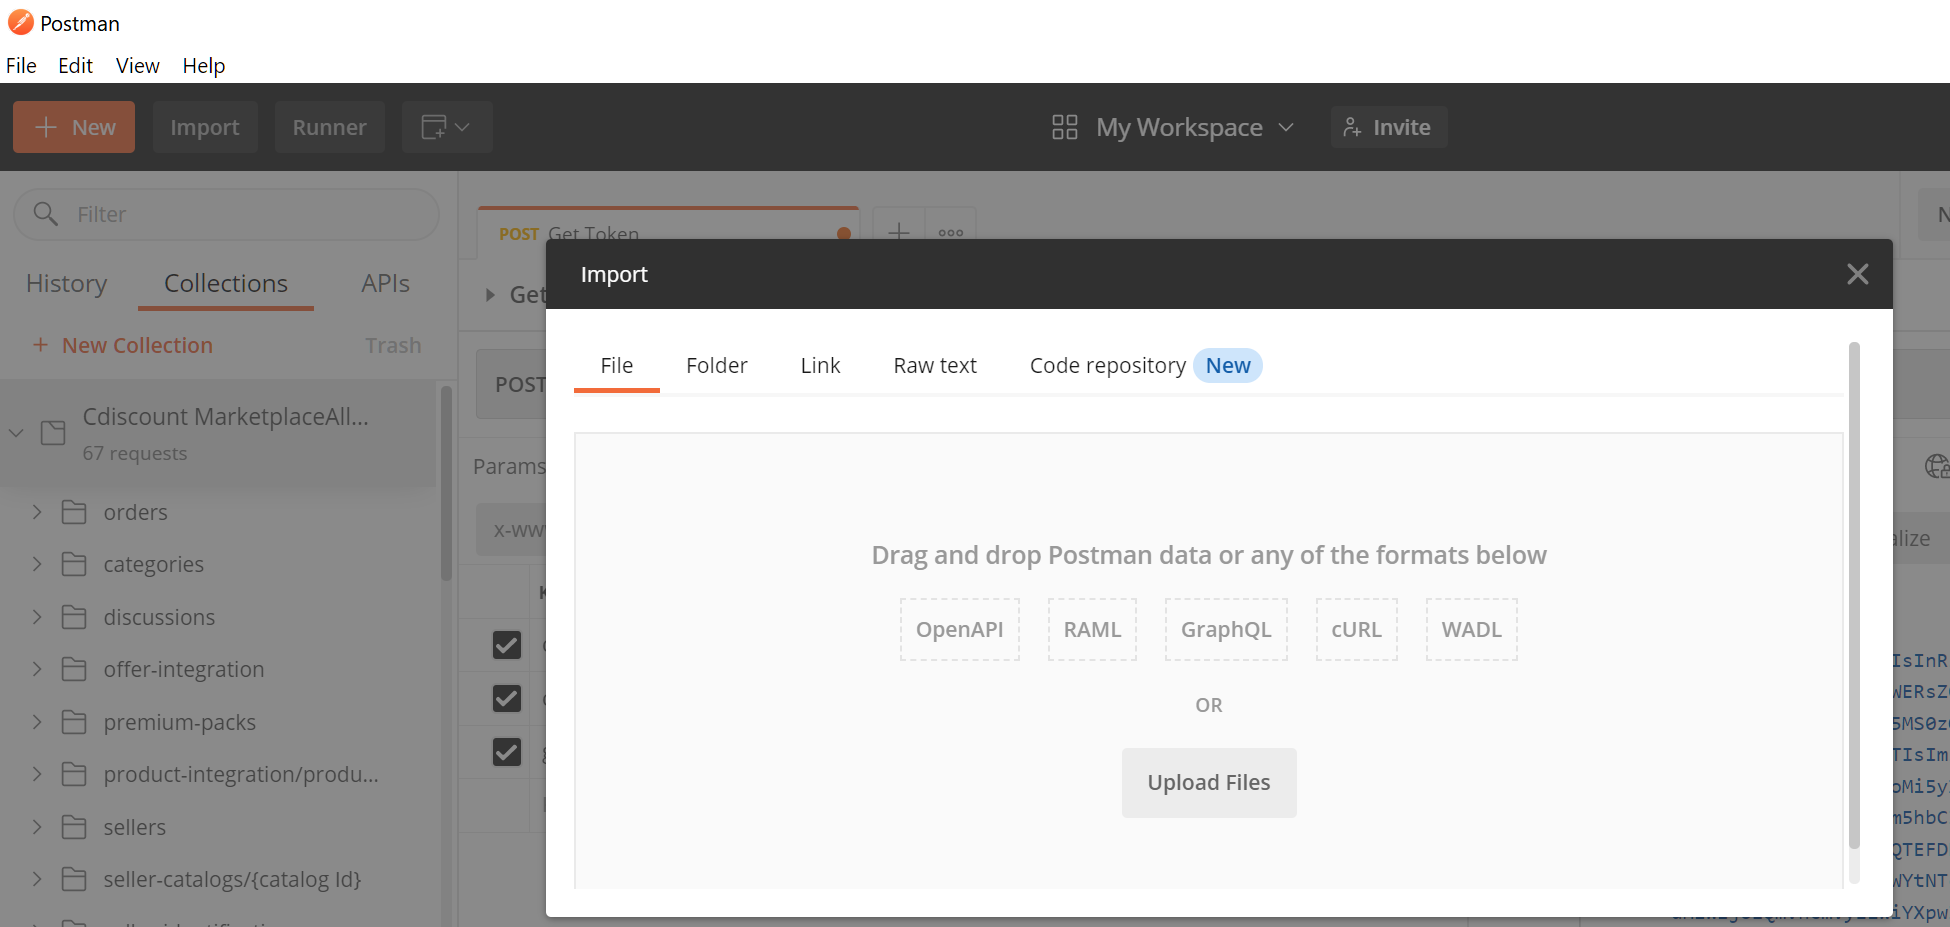
Once installed, you can import the collection in order to have our functionalities and the token generation request samples.
Step 3 – Generate your token
Open your collection and enter your login information
- Then enter your clientId (user/login) and clientSecret (password)
- The url you must use is: https://auth.octopia-io.net/auth/realms/maas/protocol/openid-connect/token

Your token is the string provided in the access_token property of the authentication API response body.
It is used during API calls in the Authorization header, prefixed with the Bearer keyword, or in Oauth 2.0 authentication from within postman.
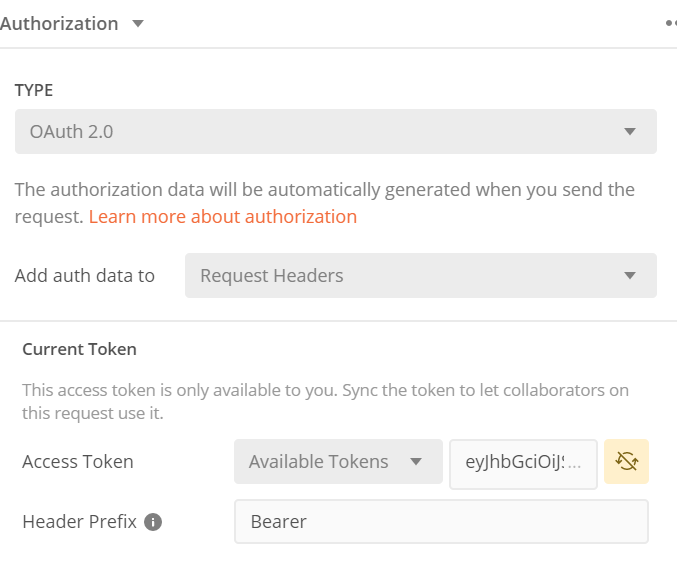
Oauth 2.0 configuration within postman
In postman choose authentication Oauth2 and insert your token
Step 4 – Making your First API call
Notes:
- From the technical documentation, you can use the “Try It” calls to test run the API.
- If you encounter an SSL error you must disable SSL in the request settings.
You now know how to get a token, from the collection, pick the method you want to call.
You can refer to the technical documentation to see which
methods are available.
All required parameters are listed in the technical documentation
To make it simple you can take a GET call without any parameters like Seller Info > Get Seller Informations.
Step 5 – Best Practices
Implementation scope
You might not need to implement all available methods, start by following your work process, and for each step, look for the corresponding API.
Understanding APIs
Refer to the functional documentation for each API perimeters
I work for an Octopia seller
Step 1 – Getting credentials
Depending on how you work with your client (the Octopia Seller), there are multiple ways to authenticate
with the API.
clientId to account cardinality being n-n, you can either :
- Case 1 : Share a common clientId/clientSecret pair with your client
- Case 2 : Have a specific clientId created for you, then ask your customer to grant you rights to his account
At any point, reaching data will require a token, and a sellerId provided in headers.
Retrieving this sellerId requires a valid Octopia Seller account (able to log-in on the Seller Portal
available at https://seller.octopia.com)
Everything happens from the API Credentials Management page.
Handling case 1 – common credentials
Direct you customer to API Credentials Management page. (I need a new client Id)
… once obtained those credentials can be used to start calling the API.

Make sure to retrieve the following from your customer :
- ClientId, created by your customer
- ClientSecret, generated
- SellerId, displayed after seller connection
Handling case 2 – custom credentials
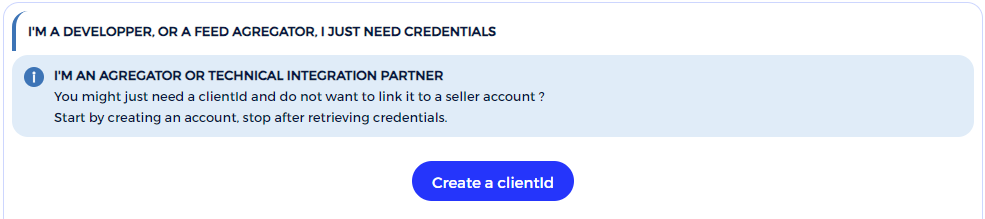
Get your own clientId (unlinked to any seller account by default) from the API Credentials Management page I am a technical integration partner.
Provide your newly created clientId to your customer, and direct them to I know my partner’s clientId (they will not need your clientSecret)
Your clientId should now be linked with their seller account.
Step 2 – Retrieve the API Collection
For easier testing, you can use the provided Postman Collection below.
This collection uses Postman
Import your downloaded collection
You can download the postman collection : Download here
Then import it from the following screen
Once installed, you can import the collection in order to have our functionalities and the token generation request samples.
Step 3 – Generate your token
Open your collection and enter your login information
- Then enter your clientId (user/login) and clientSecret (password)
- The url you must use is: https://auth.octopia-io.net/auth/realms/maas/protocol/openid-connect/token
Your token is the string provided in the access_token property of the authentication API response body.
It is used during API calls in the Authorization header, prefixed with the Bearer keyword, or in Oauth 2.0 authentication from within postman.
Oauth 2.0 configuration within postman
In postman choose authentication Oauth2 and insert your token
Step 4 – Making your First API call
Notes:
- From the technical documentation, you can use the “Try It” calls to test run the API.
- If you encounter an SSL error you must disable SSL in the request settings.
You now know how to get a token, from the collection, pick the method you want to call.
You can refer to the technical documentation to see which
methods are available.
All required parameters are listed in the technical documentation
To make it simple you can take a GET call without any parameters like Seller Info > Get Seller Informations.
Step 5 – Best Practices
Implementation scope
You might not need to implement all available methods, start by following your work process, and for each step, look for the corresponding API.
Understanding APIs
Refer to the functional documentation for each API perimeters
I’m a feed aggregator
Step 1 – Getting credentials
Depending on how you work with your clients (Octopia Sellers), there are multiple ways to authenticate
with the API.
clientId to account cardinality being n-n, you can either :
- Case 1 : Use a single clientId, capable of handling multiple seller accounts
- Case 2 : Require all sellers to provide you with their very specific clientId/clientSecret and sellerId
At any point, reaching data will require a token, and a sellerId provided in headers.
Everything happens from the API Credentials Management page.
Handling case 1 – Single ClientId
For your customers to be able to grant you access to their account you will need :
- A working clientId
- Delegation grants to your clientId
Getting a clientId
Get your own clientId (unlinked to any seller account by default) from the API Credentials Management page I am a feed agregator.

Requesting access grants
Sellers can grant you access rights in a few simple steps.
You provide them with your clientId :
From the following screen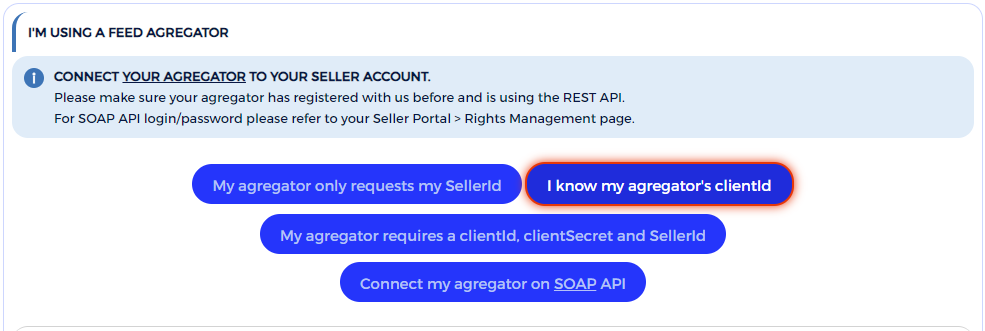
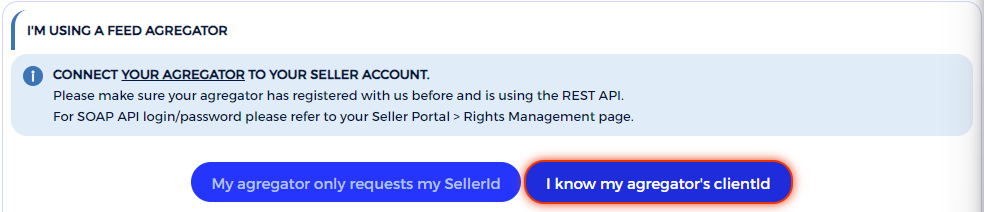
Sellers can access the following page I know my
agregator’s clientId
- Once copied and validated
- Sellers will have to use a valid Octopia Seller account to grant you the rights
- Remind them to get their SellerId from the confirmation page and provide it to you
You can get listed in the Agregator selection list :
From the same screen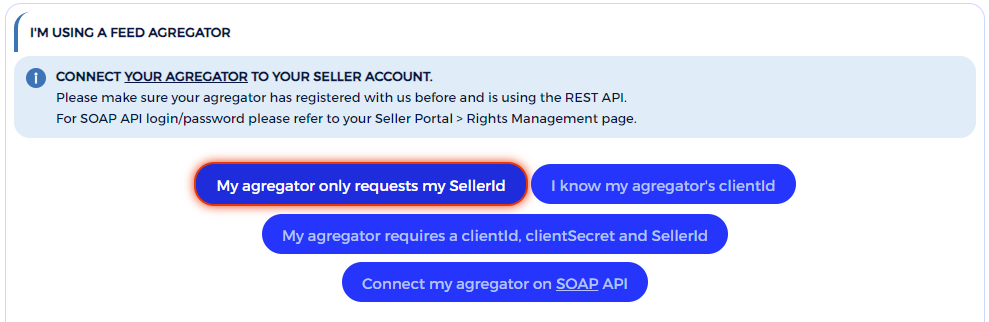
Sellers can access the following page My Agregator request
my SellerId
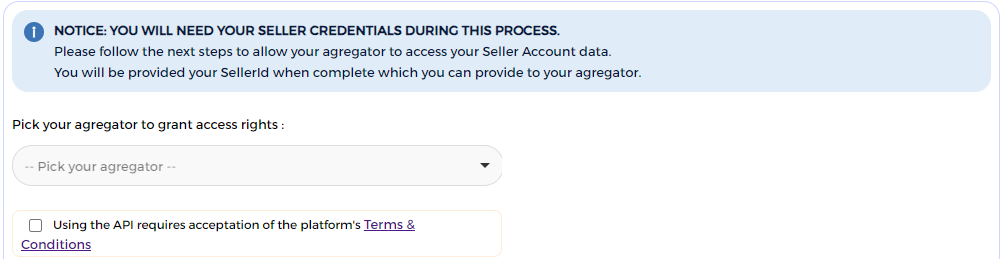
- From the searchable dropdown, the seller can select your company name/logo*
- Sellers will have to use a valid Octopia Seller account to grant you the rights
- Again, Remind them to get their SellerId from the confirmation page and provide it to you
* : contact octopia support to have your company listed on the agregator selection list
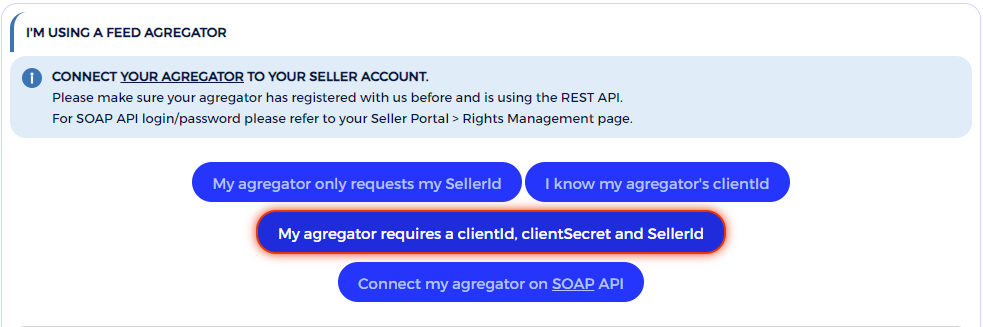
Handling case 2 – Seller Specific ClientId
Direct you customer to API Credentials Management page. (My agregator requires clientId/secret/sellerId)
… Sellers will be directed through the process of creating a clientId and granting it relevant rights to their account.
All this information (clientId/clientSecret/sellerId) can be put in your system to ensure connectivity.
Step 2 – Retrieve the API Collection
For easier testing, you can use the provided Postman Collection below.
This collection uses Postman
Import your downloaded collection
You can download the postman collection : Download here
Then import it from the following screen
Once installed, you can import the collection in order to have our functionalities and the token generation request samples.
Step 3 – Generate your token
Open your collection and enter your login information
- Then enter your clientId (user/login) and clientSecret (password)
- The url you must use is: https://auth.octopia-io.net/auth/realms/maas/protocol/openid-connect/token
Your token is the string provided in the access_token property of the authentication API response body.
It is used during API calls in the Authorization header, prefixed with the Bearer keyword, or in Oauth 2.0 authentication from within postman.
Oauth 2.0 configuration within postman
In postman choose authentication Oauth2 and insert your token
Step 4 – Making your First API call
Notes:
- From the technical documentation, you can use the “Try It” calls to test run the API.
- If you encounter an SSL error you must disable SSL in the request settings.
- You will need a valid sellerId to make test calls, seller 700982 though heavily restricted quota wise, does not need specific access grants.
All required parameters are listed in the technical documentation
To make it simple you can take a GET call without any parameters like Seller Info > Get Seller Informations.
Step 5 – Best Practices
Implementation scope
You might not need to implement all available methods, start by mapping your current feature set with available features in the Octopia API set.
Understanding APIs
Refer to the functional documentation for each API perimeters